Sunshine and Shadows
Learning Goal
- Students learn how their shadow changes during the day as the Sun appears to move across the sky.
- Students learn that shadows form when an object blocks a beam of light.
Learning Objective
- Students construct a model to explain how shadows change throughout the day.
Materials
- Parts 1 and 3
- Clock
- Level pavement that’s safe from cars and isn’t shaded
- A sunny day
- For each student pair
- Chalk - two colors
- A piece of string for each student that’s about 8 feet long
- A marker
- Parts 2 and assessment
- A dimly lit classroom
- A lamp
- A blank wall
- A computer and projector
- Shadow puppet-making supplies for each student
- 2-4 pipe cleaners
- A wood skewers or popsicle stick
- Masking tape
- Modeling supplies for each group of 3-4 (assessment)
- A flashlight
- White paper
Preparation
- Practice making human shaped shadow puppets out of pipe cleaners, if you will be demonstrating that for students. It can be simple - just a head, body, arms, legs. Keeping the puppets two-dimensional makes for good shadows.
- Check the weather forecast - this activity requires a sunny day!
- Find a spot near school that isn’t shaded and has a concrete or asphalt surface for the chalk drawings. If there isn’t a paved, sunny surface that will work, you may omit the chalk drawings and have students mark the location of their feet and the top of their shadow with stakes (or sticks).
Directions
Safety notes: Instruct students to never look directly at the Sun. The light can cause eye damage. Also, remind students about protecting their skin from sunshine when outside.
Part 1: Me and My Shadow in the Morning
- Take students outside to the paved area and have them notice their shadows. Ask the guiding question for this part: What does my shadow look like?
- Model what students will do to answer this question with the help of a pair of students.
- One student stands on the pavement in any position they want to make a shadow.
- The other student traces the first student's shoes (or traces around wheels if the student is in a wheelchair) and writes the student’s name. Explain that the class will come out to draw more shadows later, so each student will need to find where they were before.
- The student with the chalk then traces the student’s shadow and writes their name on the shadow.
- Then the students change roles to draw the other student’s shadow.
- Organize students into pairs and provide each pair with a piece of chalk.
- Have student pairs spread out so that their shadows do not overlap. Visit the student pairs to make sure they stay on track. You may notice that different students draw the shadow outlines with different amounts of precision. That is okay as long as the overall shape is relatively accurate.
- Before heading inside, note the time of day. (This part of the lesson works best as the first activity of the morning.)
Two boys demonstrate how to draw shadows with chalk. For the Sunshine and Shadows activity, students will draw just the shadow outline.
Raising Dragons Activities for Kids
Part 2: Modeling with Shadow Puppets
- Show students a video of a shadow puppet play. Explain that in a shadow puppet play, the audience watches the shadows not the flat puppets.
-
Explain that students are going to make their own shadow puppets.
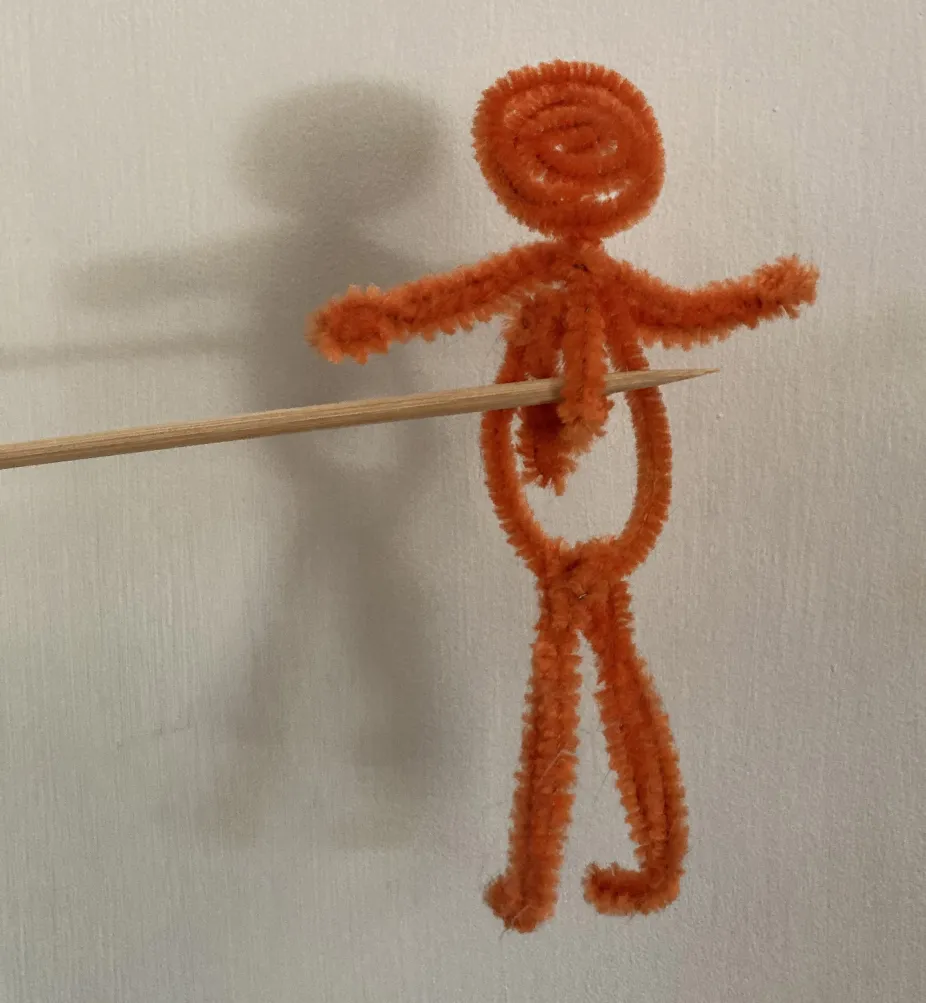
An example of a shadow puppet made out of pipe cleaners with a wooden skewer attached as a handle
UCAR
- Demonstrate how to make a shadow puppet with pipe cleaners.
- Show students how they can bend, coil, and twist pipe cleaners to make arms, legs, head, and body out of the pipe cleaners in their own ways. All people look different, so all shadow puppets can look different too.
- Students will need to attach the skewer or popsicle stick by wrapping the pipe cleaner around it or using tape. In this activity, it’s going to be easiest to have the skewer or popsicle stick coming off the side or top of the shadow puppet, rather than the bottom, so that the puppets can have their feet on the ground.
- Allow students time to make their puppets. Visit student groups and encourage creativity and exploration of the materials.
- Note that flat puppets (two dimensional rather than three dimensional) will make the most clear shadows. Also, the color of the pipe cleaners doesn’t affect the shadow.
- Gather the class and explain that now it’s time to see what sorts of shadows the puppets make. Close shades or blinds, darken the classroom, and turn on the lamp facing a blank wall. Have students make shadows on the wall with their puppets.
- Ask students: What is needed to make the shadow? (Students will hopefully mention the light, puppet, and the wall.)
- Have students explain their understanding of how shadows work by having them make drawings to illustrate what’s needed for their shadow puppet to make a shadow.
Part 3: Comparing Shadows: Morning and Afternoon
- In the classroom, remind students that the shadow appeared inside because of the lamp. Then ask them what light is causing their shadow outside (students should note that the Sun caused their shadows).
- Have students watch a video of the sun moving across the sky and ask students what they think might happen to their shadows as the position of the Sun changes in the sky. (Collect student ideas on the board.)
- Remind students of the time when they recorded their shadows before and have students look at a clock to see what time it is now. As a class, figure out how long it’s been since the morning shadows were recorded. (You may wish to keep the times to the nearest half hour if students are new to telling and writing time. Depending on your location and the time of year, students will see the most difference if it’s been at least two hours since the morning shadows.)
- Head outside, organize students into the same pairs, and provide a different color of chalk. (Safety: Remind students never to look directly at the Sun!)
- Have each student stand in their footprints again and in the same position that they were in before while the other student draws their shadow with a different color of chalk.
- Have each student lay their piece of string from the top (head) to the bottom (feet) of their morning shadow and make a mark with their marker on the string to indicate how long it was.
- Then, have each student lay their string from the top to the bottom of their afternoon shadow and make another mark to indicate how the length. (Students should find that it’s shorter if the Sun is higher in the sky.)
- Note: If your students have used a measuring tape before, this is a good opportunity to practice that skill.
- Discuss as a class:
- Is your shadow in the same place? (No)
- Is it the same size as before? (It should be shorter than it was in the morning.)
- Did everyone’s change in the same way? (yes - everyone’s shadow became shorter.)
- What’s changed? (Where the Sun is located in the sky changed. The people and the pavement stayed the same.)
Assessment: Modeling How Our Shadows Changed
- Have students work in groups to use shadow puppet and flashlight to model what happened outside to shadows between the morning and the afternoon.
- Review the parts of the model that students will be using (flashlight as Sun, shadow puppet as student, a piece of white paper on a table or the floor as pavement).
- Have groups model the difference between morning and afternoon shadows. Visit groups and allow them to explain how their model works and the difference between the morning and afternoon shadows. (Students should move the flashlight (Sun) to be more overhead in the afternoon to make a shorter shadow.)
Extensions
- English Language Arts: Read the poem My Shadow by Robert Louis Stevenson and talk about what the shadow looks like in each stanza of the poem and why.
- Art: Have students collaborate, creating and performing shadow puppet plays using their pipe cleaner puppets.
- Science: Compare shadows day-to-day to see if the pattern is the same or different
- Science: Make observations of how the location of the Sun in the sky changes with the seasons. (In upper elementary grades students will learn the reason for the seasons. At younger grades you may wish to keep to observations instead of causes.)
- Engineering: Make a Sundial (from Scientific American and Science Buddies)
Background
Why do shadows form?
A shadow will form wherever an opaque object is in the path of light. Students will find that the Sun causes shadows outside during the daytime and when clouds are not covering the sky.
Why is a student’s shadow long sometimes and short at other times?
Students will find that their shadow changes at different times of day. When the Sun is low in the sky, a student’s shadow will look longer. When the Sun is higher in the sky, a student’s shadow will be shorter. Around the summer solstice and at solar noon, the Sun can be directly, or nearly directly, overhead (depending on your latitude), which would cause little or no shadows (unless students jumped and saw a shadow beneath them!) In the classroom part of this activity, students will model why their shadow changed using a flashlight. They should recognize that they didn’t change and the ground where the shadow appeared didn’t change, so it must be the location of the Sun in the sky that changed.
Why does the Sun appear to move across the sky during the day?
The Sun appears to rise in the east and set in the west, traversing across the sky during the day. Of course, the sun itself is not moving. Earth is moving. It’s spinning on its axis. The Earth spins to the east, which is why the Sun appears in the eastern sky at dawn. As the Earth turns, the Sun appears higher in the sky and then eventually sets at sunset in the western horizon. When it’s nighttime, the Sun is visible on the other side of the Earth. This can be a very abstract concept for young learners, so this activity and NGSS 1-ESS1-1 focus on what students can observe.